
- October 26, 2022
- Posted by: Admin
- Category: Blockchain Development, Technology
In 2008, blockchain was a thing, but in recent times it has gained immense popularity. Now that the blockchain has been identified as the hottest trend in the technology world, unlocking its unmeasurable possibilities, businesses intending to modernize their traditional infrastructure to a decentralized blockchain ecosystem
Numerous new and powerful blockchains are emerging as a result of numerous iterations. According to current buzz, third-generation blockchain networks are becoming increasingly popular.
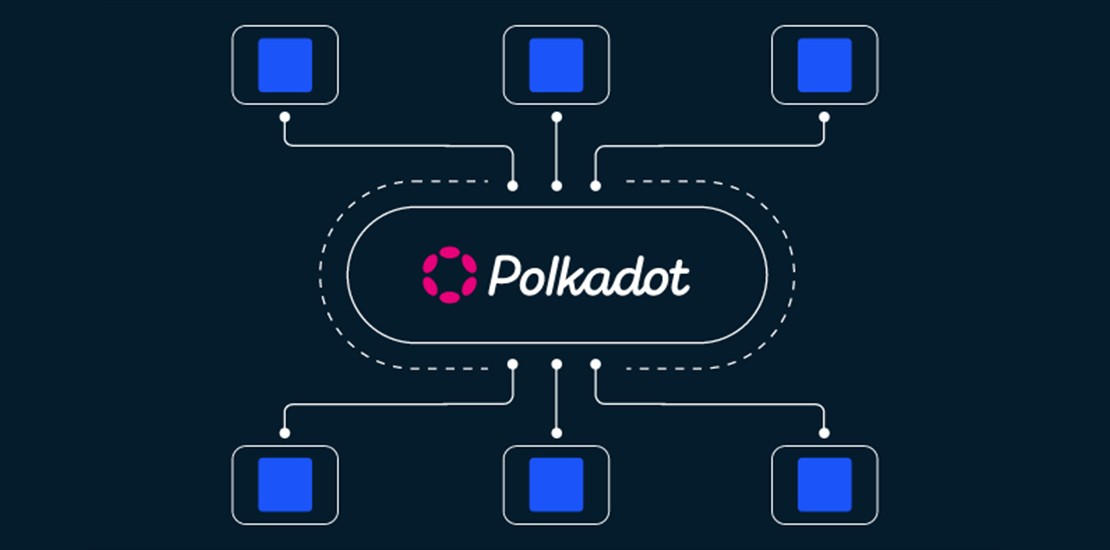
A protocol called Polkadot connects blockchains, enabling the transfer of value and data between previously incompatible networks (Bitcoin and Ethereum, for example). It is also intended to be quick and flexible. The DOT cryptocurrency, which can be purchased or sold on Coinbase and other exchanges, is used for governance and staking.
More businesses are using Polkadot to create their unique blockchains and dApps. As a result, Polkadot nodes must be built and operated by developers.
Blockchain is a distributed ledger technology built on a peer-to-peer network structure. Nodes are essential to the decentralized ledger’s operation and to carry out the planned operations. Nodes, a part of the massively distributed ledger, are in charge of authenticating the data, creating real-time contact with networks throughout the world, and confirming transactions.
Let’s talk about how to set up and operate a full node on Polkadot in this regard.
Relevant Articles:
How to build dapp on the XDC Blockchain?
How Much does it cost to develop a Blockchain App?
What is Blockchain? How to Succeed and not to fail in Startups
What is Polkadot(DOT)?
Like many other post-Bitcoin cryptocurrencies, Polkadot is both a token that can be purchased or traded on exchanges like Coinbase and a decentralized protocol.
The Polkadot protocol is made to securely connect unconnected blockchains, allowing for the direct transfer of value or data across, for example, the Ethereum and Bitcoin blockchains.
It is also intended to be quick and scalable thanks to the usage of numerous parallel blockchains, commonly known as “para chains,” which offload much of the processing load from the primary blockchain.
Developers that want to create para chains or decentralized applications on the Polkadot, Kusama, and Substrate infrastructure might need to host a Polkadot node as a backend. Polkadot avoids the danger of third-party hosted infrastructure across the huge decentralized world by enabling it to run a node on its ecosystem.
How does Polkadot work?
Three different kinds of blockchains can be created using the Polkadot network.
Relay chain
The Polkadot blockchain’s main network, The Relay Chain, is where transactions are completed. The relay chain isolates the act of adding new transactions from the process of validating such transactions to increase speed. According to 2020 testing, this architecture enables Polkadot to perform more than 1,000 transactions per second.
Parachains – Parachains are specialized blockchains that leverage the relay chain’s computer power to validate the veracity of transactions.
Bridges – Bridges let the Polkadot network communicate with other blockchains. Tokens may be exchanged without a central exchange if bridges were built across blockchains like EOS, Cosmos, Ethereum, and Bitcoin.
The Relay Chain
The Polkadot Relay Chain uses nominated-proof-of-stake consensus to keep its network in agreement regarding the state of the system (NPoS).
This system lets anyone who stakes DOT by locking the cryptocurrency in a customized contract to fulfill one or more of the following roles required for its operation:
Validators – Validate data in para chain blocks. They also contribute to network consensus and vote on proposed network changes.
Nominators – Protect the Relay Chain by selecting trustworthy validators. Validators are assigned votes by nominators who delegate their staked DOT tokens to them.
Collators- Collartors are nodes that operate and retain a complete history for each para chain as well as aggregate para chain transaction data into blocks for addition to the Relay Chain.
Fishermen – Keep an eye on the Polkadot network and report any inappropriate behavior to validators.
Users who stake DOT and execute these roles are likewise eligible for DOT prizes.
Polkadot Governance
Polkadot users can influence the software’s development in three ways.
DOT holders-
Anyone who purchases DOT tokens can use their DOTs to propose network changes and approve or reject substantial changes suggested by others.
The Council
Elected by DOT holders, council members are in charge of proposing improvements and deciding which changes are implemented in the software. Council members’ proposals require fewer votes to be adopted than those of regular DOT holders.
The Technical Committee – Made up of teams actively creating Polkadot, this group can make extraordinary proposals in the event of an emergency. Members of the technical committee are elected by Council members.
What are the different kinds of Polkadot nodes?
The Polkadot ecosystem has three sorts of nodes: archive nodes, full nodes, and light nodes. Let’s look at how these nodes work:
Archive node
An archive is in charge of retaining a record of all previous blocks, making it possible to query any block of the chain whenever needed. Users can quickly query the previous blocks using active nodes anytime. Furthermore, these nodes assist in determining the account balance of a certain block in order to ensure quick operations. Having said that, an archive node can require a lot of disc space, up to Kusama’s 12 million block space, which is roughly 660GB.
Full node
Except for the genesis block, the Polkadot’s whole node discards existing finalized blocks that are older than a specified number of days. A full node is defined as the 256 blocks following the most recently completed blocks. When compared to an archive node, the way a complete node is pruned saves a lot of space.
The light node
The light node is another Polkadot node that merely maintains track of the runtime and the current state. It only does runtime and current state without keeping details about previous blocks. As a result, instead of requesting data from the node, the light node is unable to track or read prior data.
How to set up and run a full node on Polkadot?
This post will show you how to set up and run a Polkadot node on Windows, Linux, and Ubuntu. Set up and run a full node on Polkadot by following a step-by-step guide.
Node installation and configuration instructions for Windows:
1) Install WSL first.
2) Then, install Ubuntu.
3) Ensure that you have the most recent version of the Polkadot binaries.
4) Within Ubuntu, run the following command to obtain the correct Polkadot binary. Replace the *VERSION* with the most recent version. Please enter the following code:
curl -sL https: //github.com/paritytech/Polkadot/releases/download/*VERSION*/polkadot -o Polkadot
5) Execute the following command:
sudo chmod +x polkadot
6) Begin by executing your code:
./target/release/Polkadot –name “Your Node’s Name”
7) Locate your node in Telemetry.
Get Substrate
Install this framework by following the simple Substrate installation guide. To overcome the difficulties connected with Substrate installation in Windows, consider using a virtual machine. Now, execute the following code to validate the installation:
1. λ cargo –version
2. cargo 1.41.0 (626f0f40e 2019-12-03)
Build and Clone
The following Polkadot code is available in the master branch of the paritytech/Polkadot repo:
1. git clone https:// http://github.com/paritytech/ polkadot polkadot
2. cd Polkadot
3. ./scripts/init.sh
4. cargo build –release
In either case, you can utilize a specific release to investigate a specific tag, as seen below:
1. git clone https: //GitHub .com/paritytech/Polkadot Polkadot
2. cd Polkadot
3. git checkout tags/v0.8.3
4. ./scripts/init.sh
5. cargo build –release
Run
Polkadot, the created binary is located in the target/release folder.
Polkadot
1. ./target/release/Polkadot –name “Your Node’s Name”
Furthermore, you can specify which flags can be used while the node is executing. To connect to nodes remotely, you may need to use -ws-external and -RPC-cors all.
Running an Archive Node
When you execute a basic sync node, only the last 256 blocks are retained. When validating, it defaults to archive mode. To maintain the whole state, use the -pruning flag:
Polkadot:
1. ./target/release/Polkadot –name “My node’s name” –pruning archive
The additional flag -wasm-execution Compiled can be used to double the synchronization speed. Keep in mind that this method necessitates more computational resources in the form of CPU and RAM.
Guide to installing and running Node on macOS:
To install Homebrew, enter the following command on the terminal.
1. /bin/bash -c “$(curl -fsSL https:// raw.githubusercontent.com/Homebrew/install/master/install.sh)”
2. Next, run the following command
3. brew install OpenSSL cmake llvm
4. Install Rust using the below command in the terminal:
1. curl –proto ‘=https’ –tlsv1.2 -sSf https:// sh.rustup.rs | sh
Run the following command immediately after installing RUST:
1. git clone GitHub – paritytech/Polkadot: Polkadot Node Implementation Polkadot
1. cd Polkadot
2. ./scripts/init.sh
3. cargo build –release
Start your node now:
1. ./target/release/Polkadot –name “Your Node’s Name”
Finally, configure your node on Telemetry.
Obtain Substrate
To install Substrate, follow the instructions in the Substrate Quick Starter tutorial. It should be noted that Windows users may face difficulties. As a result, use a virtual machine instead.
Once installed, execute the cargo -version command to test your Substrate installation.
1. λ cargo –version
2. cargo 1.41.0 (626f0f40e 2019-12-03)
Clone and Create
Because it contains Polkadot code, run the following code from the master branch of the paritytech/Polkadot repo:
1. git clone GitHub – paritytech/Polkadot: Polkadot Node Implementation Polkadot
2. cd Polkadot
3. ./scripts/init.sh
4. cargo build –release
In either case, you can use a specific release by checking out the specific tag v0.8.3, as seen in the following example:
1. git clone GitHub – paritytech/Polkadot: Polkadot Node Implementation Polkadot
2. cd Polkadot
3. git checkout tags/v0.8.3
4. ./scripts/init.sh
5. cargo build –release
Run an Archive Node
A simple sync node can only keep track of the last 256 blocks. During the validation process, the same basic node is used by default. To maintain the -pruning flag, use the entire state:
Execute the following command:
1. ./target/release/Polkadot –name “My node’s name” –pruning archive
You can also speed up the synchronization by running this code: -wasm-execution Compiled. This method makes extensive use of CPU and RAM computing resources, turning them off after the node is synched.
Using Docker
Finally, you must utilize Docker to execute your code. Because this is a more complicated process, you must be familiar with Docker and have node setup expertise with Docker. In addition, by default, when you execute a Polkadot node, the process only listens to the local host.
Linux Instructions
*Make sure you have the most recent Polkadot binaries.
To download, use the following command:
sudo chmod +x polkadot
Run the below command:
1. ./target/release/Polkadot –name “Your Node’s Name”
Also, use Telemetry to find your targeted node.
Obtain Substrate
To get the most out of Substrate, use a virtual machine instead of Windows. Follow the installation instructions in Substrate’s documentation step by step.
Once the installation is complete, execute the following command line to test your installation:
1. git clone https://github.com/paritytech/polkadot Polkadot
2. cd Polkadot
3. ./scripts/init.sh
4. cargo build –release
Build and Clone
Execute the Polkadot code included in the master branch of the paritytech/Polkadot repo:
1. git clone GitHub – paritytech/Polkadot: Polkadot Node Implementation Polkadot
2. cd Polkadot
3. ./scripts/init.sh
4. cargo build –release
In either case, you can use a specific release, then check the specific tag v0.8.3 indicated in the example below; run the following command:
1. git clone https:// http://github.com/paritytech/polkadot Polkadot
2. cd Polkadot
3. git checkout tags/v0.8.3
4. ./scripts/init.sh
5. cargo build –release
Run
Polkadot, the produced binary appears in the target/release folder.
On the Polkadot command prompt, type the following code:
1. ./target/release/Polkadot –name “Your Node’s Name”
You can now use the -the-help flag to determine which flags to use to launch the node. To connect to your node remotely, for example, use -rpc-cors all and -was-external.
It is important to note that the synching procedure takes time, which is determined by your system’s broadband capability, disc speed, disc space, and RAM.
Please be aware that the synching procedure can take some time depending on your system’s bandwidth capacity, disc speed, storage space, and RAM.
Running an Archive Node
Only the history of previous blocks is stored when you operate a simple sync node. The node defaults to the archive node during validation. Additionally, you can maintain blogs on their whole by setting the pruning flag:
On the Polkadot, run the following command:
1. ./target/release/Polkadot –name “My node’s name” –pruning archive
Using the additional flag -wasm-execution Compiled, it is possible to approximately treble synchronization speed. You should turn it off once the node is in sync because this consumes a lot more CPU and RAM.
Using Docker
Finally, you must execute your code using Docker. You must be familiar with Docker and have expertise in setting up nodes using Docker because this method is somewhat complex. In addition, a Polkadot node only listens to the local host when it is running.
Conclusion
Polkadot, based on the Substrate framework, makes it easier to create decentralized applications and blockchains that can communicate with one another. Developers can create cutting-edge dApps and run them on the Polkadot ecosystem for unmatched security and flexibility in expanding the existing functionality by running various types of nodes-as-a-backend.
We are here to help you if you’re interested in setting up and managing your Polkadot-based node. Contact our Polkadot blockchain professionals.